


*this post contains affiliate links*
In this blog post you will learn how to install a self-hosted WordPress blog on Bluehost. If you don’t feel confident in doing this process yourself, please contact me for my rates and installation packages. I use *Bluehost for all my hosting and domain needs and have been more than satisfied with their level of customer service and care. I have been with them for a number of years and wouldn’t be including them in this post if I didn’t think they were one of the better hosting companies out there. If you want to keep it all in one place, I encourage you to take a look at their packages. I typically pay one year at a time because 1. it’s cheaper and 2. I don’t have to keep remembering to pay monthly.

So let’s say you have purchased your domain and your hosting from *Bluehost. When you add your domain to your account, you’ll want to make sure it is an “assigned” domain. If it is your only domain, it most likely is assigned. If your domain is not assigned there are a couple ways to figure it out, one by click on the domain tab and two by going through this process.
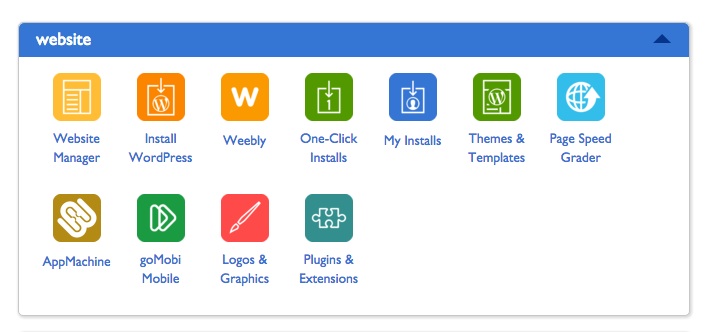
Once you log into your CPanel on your *Bluehost hosting account you will see under Website an icon that says “Install WordPress”. If you click on that it will open a new page.

Where it says, “Do It Yourself (FREE)”, you’ll want to select that and click Install.
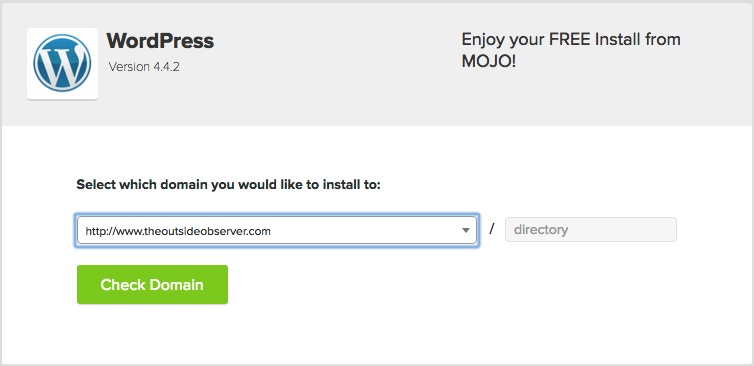
Again, it will take you to another page and here is where you’ll learn whether or not your domain is assigned. If it is NOT assigned you will not see your domain. If it is assigned, you will see the domain and you’ll select that. If you are adding your blog to your main domain as a main directory, you will just leave that yourdomain.com/ DIRECTORY alone. If you want to add a landing page or don’t want the blog to be your main page, then you can add yourdomain.com/BLOG (or what ever you wish to call it) here. Keep in mind though that you can only install WordPress on your domain once. What that means is you cannot have two WordPress installs at one time on your domain, it just won’t work. Once you have that, click on the “Check Domain” button.
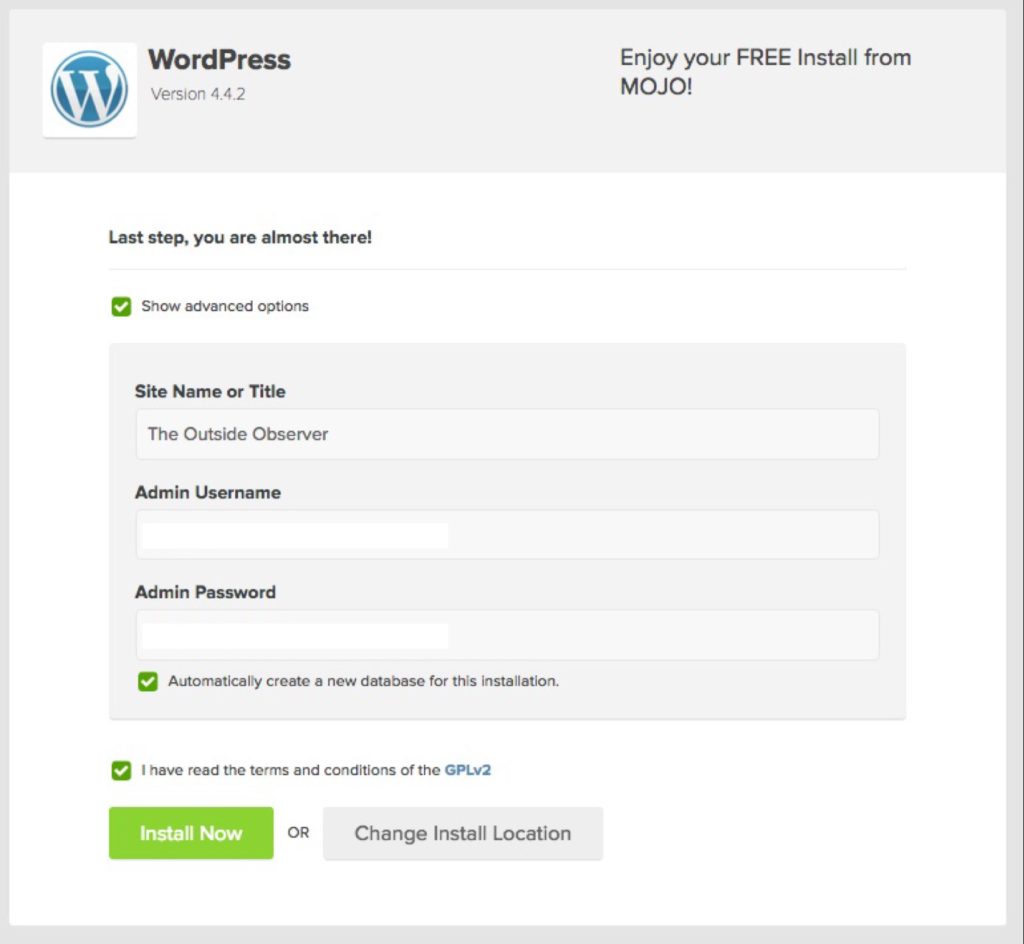
Once your domain has been checked and ok’d, you will see a box for “Show Advanced Options”. Click that box and change your site name to what ever your site name is. It is here that you can change your username and password too. This is what you will be using to log into your WordPress account so make sure it is secure and difficult to remember! Click on the Automatically create a new database for this installation. Click to add a checkmark to indicate that you have read the terms and conditions. Lastly, click on Install Now.
Now that you have installed the WordPress platform to your domain, you will be taken to a “completed page”. On the top right hand corner you will see “View Credentials”, go ahead and click that and you see the following:
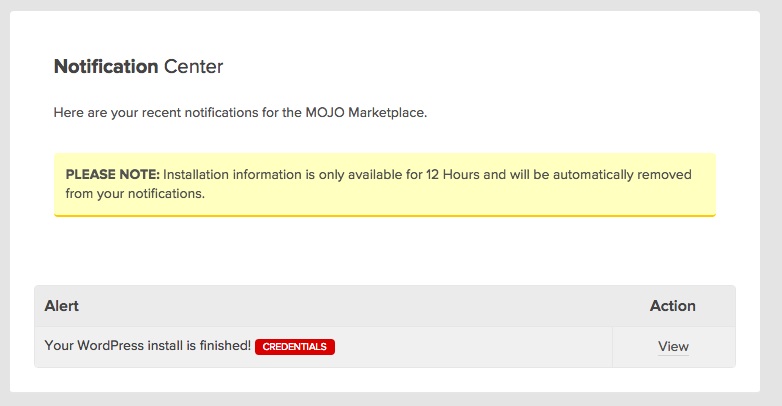
While we are here we want to click on “View” and it will talk you here:
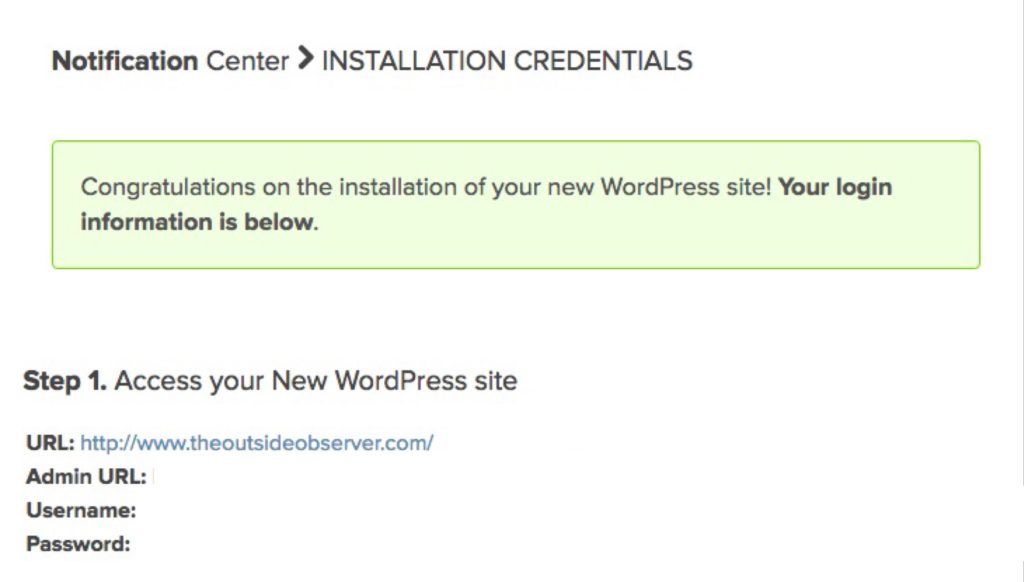
You can grab a screenshot of yours and keep it in a safe place or copy down your Admin URL, Username & Password. If you see this green box, you know you did it all correctly! But to make sure, go ahead and visit your website. If you have installed everything ok, you’ll see this…

You can click on the Admin Login or follow the link that was provided to you as in the previous image. If you follow either you should be taken to a page that looks like this:
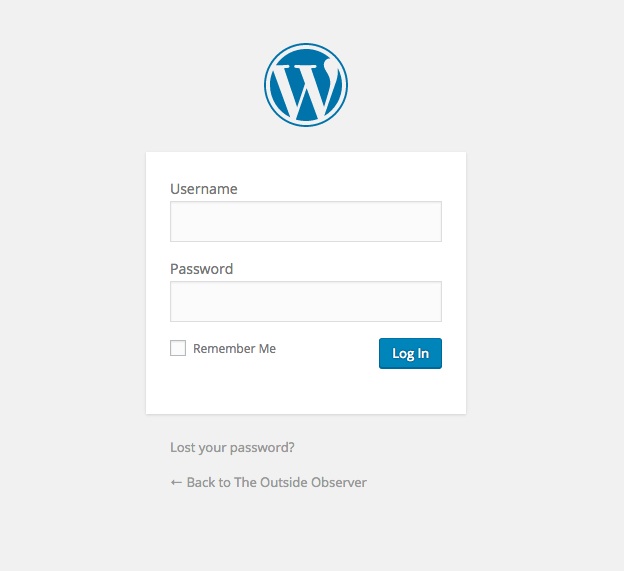
Go ahead and enter your Username and Password and if you are on your own, home computer/laptop click on Remember Me and then of course, Log In! This will then take you to the WordPress Dashboard. It may seem scary, but go ahead, take a look around! Enjoy the learning process!
This installation shouldn’t take longer than a few minutes. If by chance you don’t want to risk it, or are just not sure about what you’re doing, please feel free to reach out to me. I’d be happy to send over some rate and package information to help you get your blog up and running. Of course, there is more that goes into creating a blog than just the installation process, but this is a start.
Thanks so much & happy installing!
–Phyllis–


")


Great tutorial! I stink at stuff like this but you break it down in a way that I can understand! 🙂
Comments are closed.